Saturday, March 31, 2018

Practical Organic Gardening

The No-Nonsense Guide to Growing Naturally
Mark Highland

We were fortunate to meet Mark 10 years ago at a small, local wholesale show.  We set up next to him for a couple of years, getting to spend a couple days chatting between customers.  He showed up with his own coffee cup at a time when that wasn't typical and didn't make me feel terrible for not doing the same.  Instead, he set an example, and my sister and I soon started carrying our own cups and utensils more and more often. 
At a show in '08.
It was fun to talk to someone so excited about what they were doing.

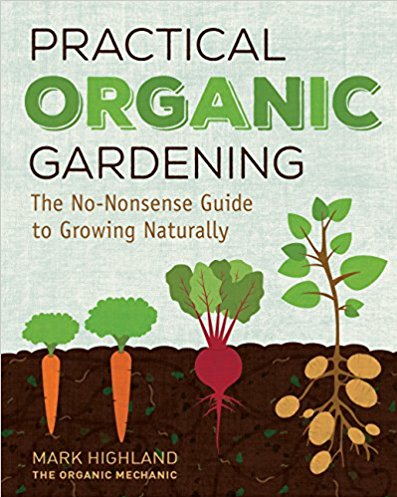
So I was excited to see his book come out, knowing that his enthusiasm and earnest fondness for dirt and the earth would be a great read.  I also knew that he would teach me something, because he's that kind of person. You always walk away knowing something you didn't know before.  And so it is with his book.  Seriously.  Get this book.

I've been gardening for decades.  Sometimes vegetables, but mostly herbs and flowers, and in all that time, I never bothered to think too much about the soil.  This is Lancaster County.  The mycelium is almost anywhere one might insert a spade or fork, so I've rarely considered amendments. 
That might change, now.
This book...
Some things I've never even thought about. How much oxygen is in the soil?  When should you till?  Should you test your water pH, and how do you install a rain barrel?  Fermenting seeds before saving them (might explain my lack of success with persimmon and paw paw seeds), and organic weed control.  How about chickens to help in the garden?

Some things I've wanted to learn more about, like tilth and biochar. 
And everything else.
Naturally control pests, how and when to fertilize, what to plant, how to save seeds, raised beds, hoop houses, on and on - it's all in there, and it's amazing!

In one really beautifully illustrated and well written book, a complete novice will find everything they need to confidently begin organic growing.

It is much more than I expected, and I highly recommend it to novices and people like me, who have been growing for years, but still want to know more. Everyone will learn something they didn't know before.

240 pgs., Hardcover.
Get it from Mark at OrganicMechanicSoil.com

Wednesday, March 28, 2018

Masonic Village Farm Market - wow!

Lancaster County is well known for the PA Dutch/Amish connection, but in the past decade or so, we're garnering attention for lots of other things.  Lititz is over the hill in one direction, and they have been named the Coolest Small Town in the US, have the best Brew Pub in the country, and Lititz Rock has become a mecca for musicians preparing for world tours.  Lancaster city has been called the new Brooklyn and was recently honored for having the best coffee roaster in America.  We've got a lot of great things going on here.
Nice large jars of elderberry jelly.  EH readers know to keep some elderberry around during flu season!

There are always surprises.  A few weeks ago, my sister's soap company took an order of soap out to the Masonic Village Farm Market in Elizabethtown (over the hill in another directon).  We'd never been there, and entering the retirement community was almost like a completely separate town.  Fields and orchards, meadows and farms, all stunning and well kept.  We were awed!

Then we got to the market.  Beautiful, local, and almost everything grown on the farm.  Additionally, there was milk, ice cream, cheeses, meat, dip mixes, baked goods, olive oil, jellies, and sauces.  The market is open year round, but the cafe isn't open quite yet - but will be in another week or so.

Here are a few pics.  I snagged the soap picture off their facebook page.

Small dairy farm - glass bottles.
Beautiful cheeses.
I won't go on and on and on about the baked goods.  But I'd like to. 
Look at this beautiful display of Lancaster Soapworks, Etc. soaps!
I'm looking forward to our next trip.  They have hand-dipped ice cream in the cafe, and I can just imagine sitting to savor it, and looking out over the valley of farmland spreading our below.
Check it out if you're local OR if you visit our beautiful area on vacation.  This is really an out of the way, non-touristy gem.

Monday, March 26, 2018

Oops - Mistake to New Product

As I've probably mentioned a thousand times, Essential Herbal had a website redesign.  It was fun and challenging, and also involved the tedious retyping of lists of products. 
In the course of one such session, I accidentally typed in "Stress" instead of  "Sinus" on the Aromatherapy Roll-On dropdown.

...and didn't notice the error.
...and then sold one - at which time, I noticed the error.
...and then wondered why we didn't have it.
My sister's been making these things for over 20 years, without really adding to them.  I talked her into the Amber & Sandalwood, and customers insisted on the Wise Woman, but otherwise, it's been a good, reliable mix.
So we made one!

And people love it!
Maybe I'll let my brain go on autopilot more often.

Wednesday, March 21, 2018

Purple Archangel (Dead Nettle) Enchiladas


This recipe was shared in The Essential Herbal magazine last spring.

Purple Archangel (Dead Nettle) Enchiladas
Jamie Jackson of MissouriHerbs.com

 Sauté 1.5 quarts purple archangel for 20 minutes in a broth while making enchilada sauce:
 This is the base recipe, I usually triple it.

1/4 C oil
1/4 C flour (I use GF)
1/2 t black pepper
1/8 t salt
1 t garlic powder
2 t cumin
1/2 t oregano
1 T chili powder
Less than 2 cups of water (you can use broth, but don't add salt)
Cheese for sprinkling on top (a cup or so)

Make just like a gravy.  Fry the flour and spices in oil for a few minutes.  Slowly add the liquid, stirring constantly.  A flat wooden spatula is nice to continuously scrape the bottom of the pan. Simmer on low, till the consistency of enchilada sauce out of can (not thick like gravy, you will be cooking this again.)
Cover thickly the bottom of your pan with the enchilada sauce.

Heat corn tortillas on a hot cast iron comal for a few seconds until they wilt over the side when slid to the edge (usually 11 seconds one side 3-4 seconds the 2nd side.)  Keep them warm in a towel.

Mix 1/4 cup of your enchilada sauce into your cooked greens and stir. 

Put a tortilla on a cutting board, cover the surface with enchilada sauce using a spoon.  Put green filling in the middle along with any shredded cheese, wild chives or whatever else.

Roll up, put in pan on top of the enchilada sauce.  When done, completely smoother with the rest of the enchilada sauce and top with some grated cheese.

Picture from Old El Paso - where you can find many other recipes.
 Put in the oven till the cheese is melted.  I do mine on the stove top in a massive wok.  I can get about 8 enchiladas in there. I put the flame on low and cover.  I keep peeking till the cheese on top is melted and you are done!
If I think I've smothered the enchiladas enough, I save some of the sauce off for dipping.  Also, if the sauce gets too thick, even if you have the enchiladas already in it, you can add a wee bit of water and sort of stir it with a fork.
This is enough for 8 enchiladas, plus enough for dipping with chips

Snow Shopping

Snow days can be good for cruising around the internet, and maybe making a purchase or two. 
We're having quite the spring snow storm and that inspired me to put a little discount on our teas.
Use the code:  spring to get a 10% discount AND a little surprise.  This is valid through Monday, 3/26/18.  Rumor has it that Mother Nature will pull herself together by then, and remember what spring is supposed to look like!   CLICK HERE to see the teas.

Sunday, March 18, 2018

Greens Soup for Spring

I made a small batch of soup early last week. 

It lasted through 3 meals, which is plenty for me, but if you have a family to cook for, this recipe is very flexible, so double or triple it for your crowd.  If you're interested in learning more about wild foods and how to get them onto the table, this recipe is almost foolproof and so delicious that it will please a lot of people who wouldn't normally *voluntarily* eat weeds. You might also want to check out our book - Wild Foods for Every Table.

This particular pot of soup contained a couple of cheats.  Sometimes the plants show up when we haven't prepared.  I used bouillon and instant potatoes for the base.  You may certainly use the real thing instead!  This was a spur of the moment, thrown together thing - which is part of the beauty of food just coming up out of the ground, unbidden!
 
Potatoes are rarely in the house, and a $1 bag of instant can last a month or two because it's only used in soups.  There is NEVER enough broth around here.  The soup was spectacular.  Here we go...
Starting on the left, chickweed, cheese, mushrooms, nettles, and wild onions down the center.
Ingredients:
1 quart stinging nettles
2 cups chickweed
3 or 4 wild onions
1 pint mushrooms (any kind)
1/2 cup Parmesan cheese
1 large bouillon cube - chicken or vegetable
1/2 cup instant mashed potatoes
Splash of olive oil
6 cups water

First, a walk around the yard,  The nettles are up about 3 or 4 inches, and are growing thickly.  It took no time to gather a quart of them.  No onions in the house, so I grabbed a few wild onions/garlic.
stinging nettles
~Inside, rinse the greens, pick through them, and then chop them up a bit with kitchen shears. 
~Peel the onions and chop finely.
~Put oil into a 2 qt pan, and LIGHTLY saute the onions. Add mushrooms.
~If needed, use a little more oil.
~Add 2 cups water with the bouillon when the mushrooms are a releasing some liquid and softening. Heat on medium high until it starts to simmer.  In the meantime...
~Mix the instant potatoes into remaining quart of water and pour into the pan.
~When it starts heating up, dump in the greens.
~As soon as the broth starts a light boil and the greens soften, use an immersion blender until most (but not all) of the mushrooms and greens are blended.  If you don't have an immersion blender, put about 1/2 of the soup into a blender until smooth.
~Add the cheese and stir.  Use additional cheese as a garnish. 
~I had some leftover chicken that went in at the end.  Croutons would be delicious too.
Chickweed (about 4x life size)
All in all, this was probably 1/2 an hour from yard to table, and it was really good. 
There were a couple other greens out today.  In the next month or so, the selections will be too many to list.
Hairy Bittercress

Ground Ivy (among many names)
Red Dead Nettle
All of these can be used, as well as garlic mustard, plantain, daylily leaves, dandelion leaves, violet leaves, clover, and on and on...  You CAN even use domesticated vegetables, if you like :-)

Friday, March 16, 2018

This year, try something just for fun.

If you're kind of new to herbs, hopefully you've spent time over the winter reading about herbs, weeds, roots, berries, and flowers that can be used in herbal tea. If you're not a newbie, you're chaffing at the bit to get out there and touch/smell/taste some fresh botanical treasure.
I've written and spoken several times about an experiment from one of my first years of seriously involving myself with plants.  That spring, summer and fall, I gathered small sprigs and handfuls of everything that crossed my path that could be used as infusions.  You may have many things that are completely different from what I gathered.

First they were thrown into a large market type basket (except roots or berries which should dry separately), and gently tossed every day when I walked past.  After a week, I switched to a second basket while the first basket finished drying.  Once dry, they went into a gallon jar.

On it went all during the warm months.  Young nettles, and chamomile dried along side the blossoms of various fruits and leaves from raspberry and strawberry.  Mints and borage flowers, elderblossoms and violet flowers and leaves eventually turned into calendula, echinacea leaves and flowers, basil and thyme.  Rose petals, sage leaves, lavender, St John's wort, raspberries, and plantain in June.
Mimosa, rosehips, hibiscus, marshmallow, beebalm, and motherwort will cross your path on hikes.  Lemongrass and ginger may be native to you, here they come from the grocer - and go into the jar.  Wild oats, linden blossoms, and catnip may wind up in there, too.  Honeysuckle?  Sure!
Visiting friends' gardens had me looking for things that would go into those baskets.  Juniper berries, a ginseng leaf, some hyssop or catmint tucked gently into a pocket for the ride home.  Passionflower leaves, tendrils and petals from a wild vine, and a hops strobile or two, some pine needles find their way into the basket.  The zests of lemon and orange is diced and dried, and some is added to the jar.  Someone grows stevia, and just a few leaves will sweeten the whole jar.
Fall arrives and elderberries are dried for the tea.  Lemon balm and verbena are welcome additions.  The list goes on and on.  In the end, I added a sprinkle of fennel seeds, some cinnamon chips, and a little licorice root.  Depending on where you live, you may find other things.

Fruits like blueberries, currants, or raspberries are delicious, but after they are dried, cut them into smallish pieces.
Finally, shake it all together. 
Over the winter, use that jar up.  No two cups/brews out of the jar will be the same.
You will have learned a lot about blending herb teas, because 99% of those cups of tea will be tasty.  1% will be either boring or bitter.  Either way, they are all an experience.  By this time next year, you will either be eager to start over, or you will have learned that there were some things that you particularly liked (or disliked), and be looking forward to getting more of that.  You will also know that you can blend luscious teas with no fear.
Get ready now, and start thinking about this so you're prepared.  Keep a basket in the car.  It's one of my favorite things to do.
Of course if this is not feasible for you and you're a tea drinker, visit our Virtual Tea Shop

Thursday, March 08, 2018

Violets, Jewels of the Field


From Mar/Apr '16

    One of the things I look forward to most every spring is stepping out into the field, basket in hand, to collect the sweet smelling violets blooming across the fields.  Visions of candied violets and sweet smelling salve fill my mind.  As I follow my well-loved path I spy the first inklings of spring.  Blooming dandelions, the wild onions shooting up and chickweed starting to come to life. Often I find them cropping out in mounds along the wood line as far as I can see.  Before I know it my basket is filled to the brim with my sweet smelling harvest. 

    Violets are one of the easiest herbs to identify in the wild making them a great beginner herb to forage.  Wild sweet violets have dark green, heart shaped leaves and small, purple or white flowers. While there are no poisonous species of viola it should be noted that African violets are not true viola.  Violets are most often found in fields along a wooded area or in a damp shady wooded area.  When harvesting from the wild be sure to find a place away from the road and in an area free of pesticide spraying.  You can always ask any groundskeeper if the areas you have scouted out are sprayed.  As with any wild harvesting you truly need to find a place as far from auto pollution as possible. 

     While violets can be cultivated, and have been by the Greeks as early as 500 BC., I find wild harvested violets to have better flavor.  As they propagate by throwing runners much like a strawberry where you find one plant you are sure to soon find more.  Finding only one plant has always been a rare occurrence for me. In much of North America you will find them blooming anywhere from the end of February and well into April.  With two blooming seasons they can be harvested later in the year but spring will find an unmatched abundance. The spring bounty is also has sweetest aroma of the year.

    Native North Americans commonly used them for medicinal purposes, including the treatment of cancer.  More recently the list of attributes include the treatment of ailments such as eczema, psoriasis and cradle cap when made into a salve for topical use.  Making a syrup or dried tea from your harvest to aid in the treatment in migraines, whooping cough and other respiratory symptoms is a great item to keep in your home Herbal medicine chest. And my personal favorite uses, candied and fresh salad greens.  Rich in vitamins A & C, both the leaves and blooms can be added to salads. They have a delicious mild spring flavor. 
    Some of my personal favorite uses are to make them into a violet infused oil for salve and making violet sugar.  And of course, drying for herbal tea.  Always use fresh violets, picked early, just after the morning dew has burned off for the best flavor. For tea I use a 2:1 ratio of two parts dried violet leaves and one part dried chamomile or violet flowers.  Prepare this as you would any other herbal tea.  Aside from being delicious, it also aides in respiratory problems.  Especially handy around cold and flu season. 

    Here is a recipe I love making with my two young daughters.  Together we collect about half a cup or so of just the blooms.  We place them in a clean, dry pint jar and fill 3/4 full with sugar.  Cover and give a shake to mix well.  Let it sit for about a week, giving a shake once or twice a day.  This is my girls’ favorite part.  After a week or so sift out the now dried up blossoms and discard, leaving the sweet, lightly flavored sugar. This is wonderful for dusting treats and delicious in lemonade and teas. 

    One final recipe I'd love to share is my very own personal recipe for wild violet salve.  You will need one cup of violet infused oil. I make this using a very small crock pot set on warm.  I add about a cup and a half of grapeseed oil, and one cup of mixed blooms and greens to the crock and stir.  Be sure they are free from excess moisture.  I like to do this part in the evening and let the combination steep all night.  Be sure your crock pot has a warm setting which is very different from low.  In the morning simply strain your oil.  This will make a little more than one cup.  Exactly what you need for this recipe.  Set a double Boiler on low and melt about one half cup of beeswax.  When melted add the violet oil and blend well.  At this point I add five drops of lavender essential oil.  This is when you will want to test your salve for consistency.  Take a bit out on a spoon and allow to cool.  Test on your wrist to see if this consistency suits you.  If you prefer a harder salve simply add a bit more beeswax.  When you have it the consistency you like pour into your desired storage.  I like Small glass jars for this. Even repurposed jars if they are clean and dry work well.  Allow salve to cool before closing the lids. 

                I hope you're feeling inspired to add wild violets to you herbal medicine chest.  Confidently foraging for and harvesting your own supply. 
By Elisha Goulet, third generation wild crafter
                                                                                            
Some recipes:
VIOLET SUGAR SCRUB